

Setting Up a Google+ Page for your Business
Setting up a Page for your business is simple — but it has to integrate with your Google account, so if you are setting one up for a client, ensure that client understands you will be using her Google account log in information — not yours!What You Need to Have Ready:
While in the signup process, you will need to enter at least two of these three criteria, depending on the Category you choose:
• A valid phone number
• Your location
• Your profile photo or Logo graphic (preferably square, though
Google+ allows you to not only drag and drop but drag and position)
When
you’re ready…1. Go to https://plus.google.com/pages/create. It will prompt you to log into your account, if you haven’t already done so. (If you have already logged into your account, you can simply select the “Create a Google+ page” beside your stream.)

2. Select the category most appropriate to your business. Your choices are:

3. Select “Create”, and follow the prompts to add:
• A powerful tagline
of 10 words that best describes your business
• Your profile photo or graphic
Inserting a photo is even
more easy than usual: Not only can you drag and drop your photo directly
from your desktop, you can also select the area of the photo you wish
to use, much as with re-sizing Facebook thumbnails:

“But Wait… There’s More…”
If you stop at simply having created your Page, however, you’ll be disappointed in the results. Even at this early Beta stage, there are a few vital tips and tricks that can significantly push your sites and Page up through Google search results. Number one you’ve already taken care of — you’ve created the +Page. Now you will need to amplify its power by installing a +1 Button on your site, so people can “vote” for you. This includes not just subscribers and followers, but members of the general public who happen to organically find your site — helped by your strong Google+ listings, of course.You see, Google+ Pages with real clout automatically open at the actual Page, if searchers are savvy enough to type “+YourName or Keyword” in the Google search box (Direct Connect)…

You can tell at a glance if a search parameter auto-connect and open up an existing Google+ Page: The Page graphic and tagline will instantly appear in the drop-down Suggestions. If you hit “Enter” on seeing such a result, that Google+ Page opens up.
The flaw? Not all existing Google+ Pages open up or even show up, even if they exist! However, you can weight your newly-created +Page to rise through the ranks and be eligible for Direct Connect by ensuring you employ a few simple strategies…

Step One: Be Ready to Share!
As you finish creating your page, you’ll be given the option to share it. Make sure you are prepared and ready to go.

(Google really does make it easy for you to cover many of the bases!)
Step Two: Setting Up your Google +1 Button
The number one key strategy lies in setting up a Google+1 button on all your websites; then publicizing the fact you have one and directing people with a call to action to “like” it. (Don’t detract from the value of Google +1 buttons, however, by using emotional coercion, or +1 buttons will soon sink to the level of Facebook’s value-less “Like” buttons.)
Setting up your button and choosing the icon size is simple, and you don’t need step-by-step instructions. It consists of:
- Grabbing a snippet of JavaScript code. (Install this anywhere on your site.)
- Scrolling further down that page and customizing the HTML code generated.
- Insert the generated code in your web page at the spot you want your +1 button to appear

What the +1 button actually does is:
• Help people discover “relevant content” (including ads) — from
personal recommendations
• Display
your own profile photo, when you “like” a +1 button on someone else’s
Page, site or Circle. (You can choose to “hide” this, if you prefer.)
• Allows others to recommend your own sites
or Page
• Allows others to see which
of their own friends and connections has also personally endorsed your
listings
• Allows others to see how
many +1 ratings you’ve received. (You can customize this not to show, if
your business, website and/or Page is brand new.)
• Increases your sites’ relevance and value
in Google’s eyes, upping your SEO status and rank
• Increase your visibility and prominence in
search results
Remember, however, that any page or site you add
+1 to will be public — even if your Robots.txt file or WordPress blog
settings are set for “nofollow”.Step Three: Enabling Google+ Circles — This area of Google+ already plays a big part in Google+ Page engagement and promises to grow in importance, so you might want to adjust your settings to automatically add Pages to your own Circles. Here’s how to do it…
1. Click your
profile picture in your Google+ menu bar, at the top of your page
2. Select “Account Settings”
3. Select “Google+”
4. Scroll to the bottom and customize your
“Google+ Pages” settings
Here is where updating your page with
fresh content really becomes part of a vital strategy.Step Four: Creating a Badge
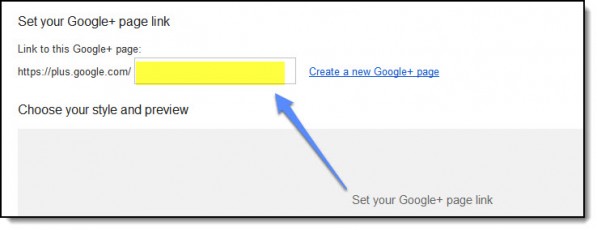
Creating a Google+ Badge for your site is not the same as creating a +1 button, so don’t confuse the two. You can simultaneously create your badge and your page; or you can copy-paste your page URL into the box provided:
Continuing down the page, you will select the size of badge you prefer…
Step Five: Google+ Direct Connect
This is the ultimate goal you are aiming for, when it comes to boosting your Google+ and Google+ Page rankings. Google freely admits eligibility is “determined algorithmically”, based on:
• Relevance
• Popularity
The
most crucial defining factor is the number of links between
your site and Google+ Page. If you have followed the
previous steps, you are already well on your way to becoming eligible.
All you need to do is:
• Regularly
interact with Google+, supplying relevant contact (Links, posts,
keywords)
• Pay diligent attention to
ensuring your content is not only relevant, but original and valuable
too
• Educate your audience
(especially those you network with) about Direct Connect and how it
works. They’ll particularly need to know that the option to sign into
Google+ so they can add your page to their Circles is only offered the
first time they visit your Page — after that it has to be added
manually, which reduces the chance they’ll do so
Once Google
perceives your value, you stand a much better chance of being admitted
to the hallowed halls of Direct Connect.This brings us to our last step (until Google+ rolls out more features)…
Step Six: Promote Your Page!
Television long ago learned the secret to engaging viewers and netting high conversions: Namely, spelling out the obvious and telling viewers exactly what to do next.
And just as TV ads also employ the principle of repetition, you must realize that promoting your +Page is an ongoing responsibility.
Here’s how you can encourage your visitors and subscribers to spread the word:
1. Share your posts — but
remember, even if you share a post from your Google+ Page, those in your
Circle will actually see it as coming from your Profile.) And keep your
content as consistent as your daily involvement: Remember your main
area of focus and use your best keywords, as naturally as possible.
2. Link your Page and your
website or blog. You may think you’ve already done this, if you’ve
installed your Google+ Button on your site — but it’s actually a
two-step process, to be effective: You also have to add your
site to your Profile!
Here’s how to do it, using a
current browser such as Google Chrome…
•
In your browser, find your picture and select it (the top right corner)
• Select “Profile”

• In your Profile, select the “About” tab

• Select
“Links” and then “Add a Custom Link”
•
Enter (a) a Title (b) your URL
• Save
(If
you can’t see “Links”, selecting “Edit Profile” and placing your link
in the “Introduction” will work just as well.)
3. Link your Google+ Page to your
AdWords campaigns — Do it by making sure you include your +1
button in your ads.
4. Post
Consistently — Regular updates and fresh content will add to
your Google value. This will help build a firmer foundation for your
+Page
Along the way, as you grow more familiar with your Google+
Profile and Page, you’ll discover other ways you can help boost your
+Page popularity: Enabling Google+ for Mobile (if you have the right
type of phone, for example; as well as joining the Preview Platform so
you can receive advance improvements ahead of the crowd.Become familiar with the refinements available through Google Support Plus. Be sure also to actively report bugs and provide feedback to Google+ (as well as never promoting your Page with the same dirty-pool, emotional blackmailing techniques that Facebook users quickly learned to employ).
The more you engage and bring quality to your Google+ Page, the more directly you will be rewarded in Google SEO.
It’s true that “you get out of it what you put in” — but fortunately with Google+ Pages, these six basic steps provide a solid foundation to help you easily and effectively get started.
By Matthew Tommasi at TheSocialMediaGuide
0 comments:
Post a Comment